
Pour over is a very popular percolated brewing method that almost represents half of the third wave coffee movement. The name is quite literal. It works by pouring water over the coffee ground to manually extract coffee. In some coffee shops, you might hear people use the word “slowbar”, appropriately passing on the impression that this method takes a bit more time. A lot of coffee aficionados swear by pour over and will not settle with other ways of making coffee. It’s loved for a cleaner, more delicate brew. In today’s post, we are going to show you how you can nail this method on the first try and discover new techniques that can elevate your brew.
Today we will focus on a basic recipe that works exceptionally well with light roast coffee, especially with home grinders which tend to produce more fine grounds. This brew guide is also based on V60, a pourover application by a Japanese company Hario.
V60 is probably Hario’s most popular and well known product. It comes in 3 sizes: 01 is the smallest, advertised for 1~2 cups; 02 is for 1~4 cups; and the not as common 03 is designed to make up to 6 cups. V60’s iconic spiral ridges encourage water passage and its cone shape encourages a centered draw down. You can easily find this brewer in ceramic, glass, metal and plastic.
Fun fact: Hario is very well known now for their specialty coffee products. The name means the king of glass. The company actually first established itself as the leader of heatproof glass making in Japan.
Are you ready to brew some coffee? Put on your favorite music, gather these tools and let’s dive right into it!
. coffee beans
. burr grinder
. V60 pour over brewer
. V60 filter
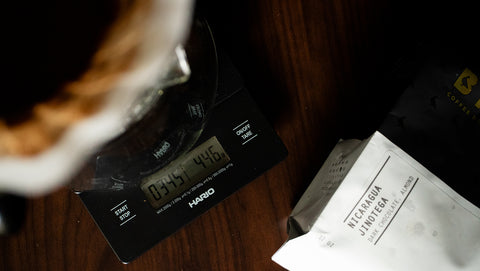
. scale
. timer
. gooseneck kettle
. decanter or mug large enough to hold 14oz of liquid.
STEP 1: GET THE WATER READY
As a basic guideline for brew water temperature, you can use hotter water with a light roast coffee to yield more extraction. For this recipe, we are recommending using a higher temperature between 205°F and 210°F.
STEP 2: SET UP V60
Fold the seam over onto the filter itself. Insert filter into brewer. Rinse filter with hot water.
STEP 3: GRIND YOUR COFFEE
Weight out 28g of coffee. This recipe is designed for most home grinders which usually has smaller burrs. Smaller burrs produce ground size that’s wider in range, with significantly more fines. We are looking for a medium fine grinder size for this recipe to shorten the range between particle sizes. Finer grind size also helps to extract coffee better if you’re using a very light roast.

STEP 4: BLOOM
Tare the scale and start the timer. Don’t forget to tip out the rinse water in the decanter if you haven’t done so already.
Gently pour about 60g of hot water over the coffee ground. LIft up the V60, and swirl the brewer to promote more saturation. The texture should resemble a well blended pumpkin soup. If you can still see lumps of coffee, keep swirling to break it up. Let the coffee bloom till the 0’30” mark.
Blooming is an important step when it comes to pour over. The purpose is to ensure all coffee grounds are saturated and ready for extraction.

STEP 5: RAISE SLURRY
Starting from the center outward to a maximum of 1/2 inch from the filter, aggressively pour water till the scale reads 170g to 190g of water.
This step is to raise the slurry as high as possible, so you will have a large mass of hot water to retain slurry temperature throughout the brew.
STEP 6: PULSE POUR
Changing your pour to a steady stream, pour more water whenever the water level of the slurry goes down about 1/4 inch. Be mindful not to fill more water above the elevated coffee ground. Continue pouring until the scale reads 380g.

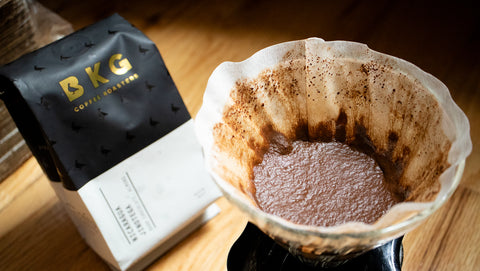
STEP 7: FLATBED DRAW DOWN
Let the water of the slurry go down further to about an inch from the top. Then focusing mostly on the center, flush the slurry aggressively. With your last pour, flush the coffee ground off the filter. End weight: 450g.
Firmly tap the brewer on the decanter to slightly increase draw down time. You should expect the brew to finish dripping between 2’00” to 2’30”. The coffee bed should look relatively level.
HOW TO DIAL IN YOUR COFFEE
For this recipe, brew time is a very useful guideline to adjust your brew if you’re not happy with it. If the brew finishes within 2 minutes, then you should grind your coffee finer; longer than 2’30”, then you should use a coarser grind. If your coffee comes out within the brew time, but tastes light and lacking sweetness, do not be afraid to use a higher water temperature. It’s not uncommon for baristas to use straight off boil water temperature for light roast coffee.
If all else fails, then it’s time to find a different recipe for your coffee. Visit our last post on coffee extraction for some ideas. Or stay tuned for a different pour over recipe.
BONUS PRO TIPS
This recipe is very forgiving in a lot of ways. You don’t have to be super careful with how slowly you pour the water. As long as you make sure you don’t flush the coffee ground off the filter prematurely, this method should give you an even and consistent brew. However, by gently placing one hand on the lid of the kettle (be mindful of hot surfaces!), or use a dry towel to support the kettle from underneath, you should find your movement more stabilized.
HAPPY BREWING
This recipe is particularly designed for beginners and home baristas. We sure hope this brew guide answers some questions and inspires you to give it a try. It’s a very good baseline to dial in a coffee for pour over. Let us know if you try it. Do you find it easy to execute? How does the coffee turn out? Does the coffee bed look mostly flat by the end?
If you’re ready to dive further into the realm of pour over techniques, we have another pour over brew guide coming shortly. Stay tuned especially if you’re looking for a recipe that will give you more body and even more sweetness. We will see you soon in our next post!
